
Planning to visit the United States? Whether for work, study, or tourism, obtaining a Nonimmigrant US Visa is an essential step. This guide breaks down the process into manageable steps, ensuring a smooth application journey. Let’s dive into the details of how to make your application stress-free and successful.
Your Complete Step-by-Step Guide for Nonimmigrant US Visa
Step 1: Determine the Right Visa Type
The first step is choosing the correct visa for your purpose. Common visa types include:
| Visa Type | Purpose |
|---|---|
| B-2 | Tourism/Short Visits |
| F-1 | Academic Studies |
| H-1B | Specialty Occupations |
For short-term travel, check if you qualify for the Visa Waiver Program. Selecting the appropriate visa type ensures your application starts on the right foot.
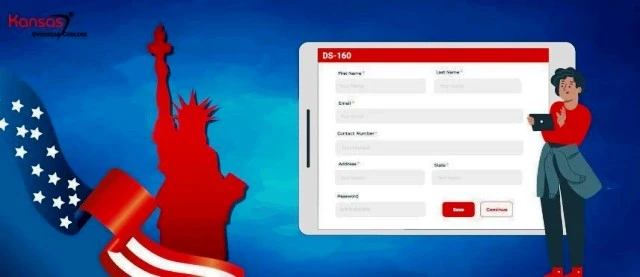
Step 2: Complete the DS-160 Form
The DS-160 Visa Application Form is the next step. This online form requires details about your:
- Personal history
- Travel plans
- Digital photograph (check specific guidelines)
Tips:
- Double-check for errors to avoid delays.
- Save the confirmation page—it’s required for your visa interview.
Step 3: Pay the Visa Application Fee
The Visa Application Processing Fee is essential for moving forward. Fees vary by visa type:
| Visa Type | Fee Amount (USD) |
|---|---|
| B-2 | $160 |
| F-1 | $160 |
| H-1B | $190 |
Pro Tip: Confirm the payment methods accepted by your local US embassy or consulate.
Step 4: Schedule Your Visa Interview
To book your visa interview:
- Visit the official US embassy/consulate website.
- Use your DS-160 confirmation number and fee receipt to schedule the appointment.
- Check the wait times for interviews in your region.
Appointments fill up quickly, so plan ahead. Take note of the date, time, and location.
Step 5: Prepare for Your Visa Interview
Preparation is key to a successful interview. Required documents include:
- Passport
- DS-160 confirmation page
- Visa Application Fee receipt
- Supporting documents (e.g., financial proof, travel plans)
Practice Questions:
- Why are you visiting the United States?
- What are your ties to your home country?
Organize your documents to ensure a smooth experience.
Step 6: Attend the Visa Interview
On the day of your interview:
- Arrive on time with all required documents.
- Answer questions honestly and confidently.
- Provide additional documents if requested (e.g., job offers, school acceptances).
Stay calm and professional throughout the process.
Step 7: Visa Approval and Next Steps
If approved, congratulations! Your passport will be returned with your visa:
| Delivery Method | Details |
|---|---|
| Courier | Delivered to your address |
| Pickup | Collect from consulate |
Double-check the visa details, including type and validity dates. If further processing is required, follow up promptly.
Tips to Make the Process Easier
- Start early to avoid delays.
- Use official embassy resources for accurate information.
- Keep all documents organized.
- Follow photo guidelines strictly to avoid rejections.
By staying prepared, you’ll breeze through the process.
Obtaining a Nonimmigrant US Visa doesn’t have to be overwhelming. By following these steps and preparing thoroughly, you’re setting yourself up for success. Start your application today and take the first step toward your US adventure!
Common Questions About Nonimmigrant US Visas
1. What is a Nonimmigrant US Visa?
A Nonimmigrant US Visa allows temporary entry into the United States for specific purposes such as tourism, study, or work.
2. How long does the application process take?
Processing times vary by visa type and location but can range from a few days to several weeks.
3. What happens if my visa is denied?
If denied, the consulate will provide a reason. Address the issues and reapply if necessary.
4. Can I expedite my visa application?
Certain visa types may offer expedited processing. Check the official embassy guidelines for eligibility.
5. How long is a Nonimmigrant US Visa valid?
Validity depends on the visa type and reciprocity agreements with your country. Verify the duration before traveling.